Loading

NAVIGATION BAR

Wednesday 20 June 2012

How to Root Samsung Galaxy Y S5360


How to Root Samsung Galaxy Y S5360


Samsung has finally launched its low end Smartphone in order to compete with Smartphone havingvery low cost and supporting android operating system. This Smartphone by Samsung is named asSamsung Galaxy Y S5360.This Smartphone has 2MP camera, Android 2.3 OS, 832 MHz processor and 3.0 inch TFT capacitive touch screen.
samsung galaxy Y How to Root Samsung Galaxy Y S5360
However as this Samsung Galaxy Y S5360 was at low cost it has got some less features as well as low optimization on Operating System all in order to come to its low price. In order to remove the limited functionality of this device the rooting of the Smartphone is necessary. Rooting process is known to be quite risky but yes if followed properly you will be completely safe. Rooting is very compulsory step required for low end Smartphones. So let’s get started. But remember to completely charge your device as this is the starting requirement.
Safety First :
As you are going to do a risky job follow these safety measures before starting.
  • Your Smartphone should be fully charged or at least with 60% charged, in order to get ready for rooting else if you try on low battery your Device will crash and hence will get Jammed.
  • Backup all your Data like Images, Contacts etc. before rooting because all files will get removed during rooting of the device.
  • Close all the background applications, especially antivirus and battery checkup utility.
  • If you a newbie, better Pray to god hoping everything would go fine icon razz How to Root Samsung Galaxy Y S5360
  • Before Starting, Enable USB Debugging on your mobile. This can be done as follows Settings > Applications > Development

Steps Required in Rooting your Samsung Galaxy Y S5360

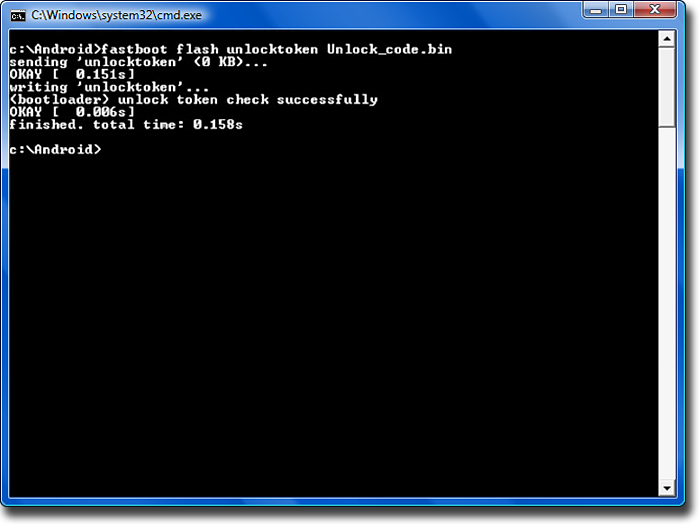
  1. Download the Required Root Package HERE
  2. Connect your Device Samsung Galaxy Y S5360 to the computer only via USB. (Forgot about Bluetooth)
  3. No Extraction is required. Copy the Zip file to the root of the SD card and remember not to paste in any folder as it would cause an interruption.
  4. Never Unplug your Device Samsung Galaxy Y S5360 while rooting
  5. Switch off your Smartphone to enter into recovery mode
  6. Keep pressing The Volume Up KeyHome key and Power Button  to enter the recovery mode.
  7. Now, as you are in the recovery mode only Volume up and down would work to select the file. So use those  buttons and select Update.zip .
  8. The rooting will start taking place after you have selected on Update.zip. It would usually take about 10-15 mins
  9. After rooting the device will automatically restart and then normal booting will take place. Therooting of your Phone is now done!
Congratulations! You have successfully rooted your Smartphone Samsung Galaxy Y S5360 and now you can add any applications without any limitation as well as you can even install Custom ROM or Cyanogen Mod, if you wish.

HOW TO ROOT SAMSUNG GALAXY S3 III


INTRODUCING THE SAMSUNG GALAXY S3 TOOLKIT


FUNCTIONS OF SAMSUNG GALAXY S3 TOOLKIT V1.0 [GSM][11TH JUNE 2012]
  • Install drivers automatically
  • Backup/Restore a single package or all apps, user data and Internal Storage
  • Backup your /data/media (virtual SD Card) to your PC for a Full Safe backup of data
  • Perform a FULL NANDROID Backup of your system via adb and save in Custom Recovery format on your PC
  • Pull /data and /system folders, compress to a .tar file and save to your PC
  • Backup/Restore your /efs partition
  • Dump selected Phone Partitions, compress to a .zip file with md5 and save to your PC
  • Install BusyBox binary on phone
  • Root any public build (different options available)
  • Flash Stock Recovery or CWM Recovery (thanks to ChainFire for his modified CWM)
  • Flash Insecure Boot Image for adb mode
  • Install a single apk or multiple apk's to your phone
  • Push Files from your PC to your phone
  • Pull Files from your phone to your PC
  • Set Files Permissions on your phone
  • Dump selected LogCat buffers to your PC
  • Dump BugReport to your PC (if installed)
  • Help, Information Screen for various tasks
  • Reboot Phone options in adb mode
  • Change background, text colour in ToolKit
--------------------------------------------------------------
--------------------------------------------------------------


!CLICK HERE TO DOWNLOAD THE SAMSUNG GALAXY S3 TOOLKIT V1.0!


Please remember this is the 1st release and there may be some errors. Report anything you find so I can fix them asap.


NOTE: As the ToolKit.exe file isn't Digitally Signed with a Microsoft Certificate it 'may' get picked up as potentially harmful by Antivirus Programs and deleted on first run. If this happens restore the file and exclude it from future scans to use it.


--------------------------------------------------------------
--------------------------------------------------------------


THE EXTRAS V.I.P. SECTION IS AVAILABLE TO DONATORS AND CONTRIBUTORS OF THE TOOLKIT AS A THANK YOU FROM ME. THIS SECTION CONTAINS BROWSER TIPS, GENERAL TIPS, KEYBOARD TIPS, MARKET TIPS, SCREEN TIPS, SECURITY TIPS AND SETTINGS TIPS AS WELL AS A FEW TRICKS YOU CAN DO WITH YOUR PHONE. I WILL CONTINUE TO ADD TO IT BUT IN NO WAY SHOULD YOU DONATE JUST TO SEE THE EXTRAS SECTION AS IT WAS ONLY MADE AS A THANK YOU. THIS WILL BE AVAILABLE AS SOON AS I KNOW EVERYTHING IN THE TOOLKIT IS RUNNING SMOOTHLY 


(Changelog at the Bottom of Post#1)


PLEASE READ THE *FAQ* IN POST#2 BEFORE ASKING QUESTIONS


--------------------------------------------------------------
--------------------------------------------------------------


1. INSTALLING GALAXY S3 DRIVERS


The first thing you need to do is to install the drivers. These are needed so that you can communicate with the phone via the PC and perform the tasks that the ToolKit offers.


a. Make sure your phone is booted into Android and the USB cable is unplugged.


b. Select Option 1 in the ToolKit to install the Samsung USB Driver pack. This should install all the neccessary drivers you need.


c. After the drivers have been installed connect the USB cable and the PC should detect the phone and install the correct drivers. This will also happen when you enter Download Mode and Recovery Mode for the first time.


d. If you want to check the drivers then go to your Control Panel on your PC and open the Device Manager. With the USB cable connected you should see a device listed as 'Samsung Android Phone' or something similar and a driver attached to it.


--------------------------------------------------------------
--------------------------------------------------------------


2. USING MSKIPS' SAMSUNG GALAXY S3 TOOLKIT V1.0


a. Download the Samsung Galaxy S3 ToolKit package and run to install the ToolKit to your PC. The installation will also create a Shortcut on your desktop for easy access. You have the option to include or exclude the drivers files at installation so if you already have your drivers set up and are just updating the ToolKit then you can untick the drivers if you wish.


b. Once the ToolKit is installed make sure your phone is booted and plugged in via USB cable and double click on the 'Samsung GS3 ToolKit v1.0' shortcut on your desktop to run it.


c. When you enter the Main Menu you will see 'Adb Mode' at the top. If you have installed your drivers correctly then you will see your phones serial number under the text. If you see this then your device is connected and you can carry on.


d. Each option has full information on what it is and how to use it.


--------------------------------------------------------------
--------------------------------------------------------------


3. FLASHING A ROM, RADIO OR KERNEL VIA CWM RECOVERY


a. Download your chosen Rom, Radio or Kernel from the Development Forum, then make sure your phone is booted up as normal and connect your usb cable so it goes into MTP Mode. Copy the .zip file (DO NOT UNZIP IT FIRST) to the 'Internal Storage' part on your phone. Do not copy it to a Sub Directory as it will be harder to find when flashing it.


b. Enter CWM Recovery (shut down the phone then hold down the 'HOME' + 'VOLUME UP' buttons and press the 'POWER' button for about 5 seconds).


c. Scroll down to 'Install zip from sdcard' and select using the HOME button. Then select 'choose zip from sdcard' if the file is on the external Memory Card or 'choose zip from internal sdcard' if the file is on Internal Memory.


d. Scroll to your zip file and select. Then scroll down to 'Yes' in the list and select to start flashing.


e. When flashing is finished press the BACK Button to go back until you get to the Main Menu and then select 'reboot system now' to reboot your phone into Android.


--------------------------------------------------------------
--------------------------------------------------------------


4. FLASHING A ROM, RADIO OR KERNEL VIA DOWNLOAD MODE USING ODIN


Odin can be used to flash image files or parts of your phone. You can flash something as simple as a boot image or a complete system. Everything is packed in a tar or tar.md5 file on your PC and flashed via Odin which is a Windows OS program.


a. Make sure you have your tar file stored on your PC.


b. Reboot your phone to Download Mode [shut down your phone, then hold down the Home + Volume DOWN Buttons and press the Power Button for about 2 seconds until a Warning screen appears. Press Volume UP to continue to Download Mode.


c. Connect your phone via usb and the first box at the top under ID:COM should turn blue and have some text in it. If you are using Download Mode on your phone for the first time then you will notice drivers being installed to use it.


d. The site or page you downloaded the file from will usually give you instructions to set Odin but if not you want to load boot/recovery/system files to the PDA location and have 'Auto Reboot' and 'F.Reset Time' ticked and nothing else.


e. Click on 'Start' to start the flash. You can see what is happening in the text box in the lower left.


--------------------------------------------------------------
--------------------------------------------------------------


USEFUL INFORMATION


How to get into Recovery Mode
1. Unplug the USB cable.
2. Shut down the phone.
3. Hold down the 'HOME' + 'VOLUME UP' buttons and press the 'POWER' button for about 5 seconds to enter Recovery Mode.


How to get into Download Mode (For Odin)
1. Unplug the USB cable.
2. Shut down the phone.
3. Hold down the 'HOME' + 'VOLUME DOWN' buttons and press the 'POWER' button for about 2 seconds until a WARNING! Screen appears. Press the 'VOLUME UP' button to enter Download Mode.


--------------------------------------------------------------
--------------------------------------------------------------


ChangeLog:
ToolKit v1.0 (10th June 2012)
+New release
__________________
thanks to XDA_FORUMS....
orginaly post link followed by....

Tuesday 19 June 2012

HOW TO ROOT Samsung Galaxy S2 for T-Mobile


HOW TO ROOT Samsung Galaxy S2 for T-Mobile


With Ice Cream Sandwich just around the corner – the Samsung Galaxy S2 for T-Mobile and its Galaxy S2 siblings are likely to have the highest bounty to get ICS on it as soon as humanly possible. If you’re thinking about wanting to truly customize your Android phone – and this is currently one of the best Android phones on the market – then look no further than rooting! Check out our comprehensive guide here!
That’s right, there is finally a way to root your Galaxy S2 on T-Mobile, thanks to some of the forum members on RootzWiki’s forums. For those of you new to Android, rooting is amazing. It basically give you the ability to have total control of everything on your device, much in the same way an administrator would have full access to a computer. Right now, if your phone isn’t rooted, you’re really more like a guest. Rooting allows you to remove or freeze bloatware — like Verizon’s VCast and other carrier specific apps — that are annoying, and you are unable to delete without being rooted. Oh, and then there’s everyone’s favorite – flashing custom ROM’s!
So lets get to how to root your Galaxy S2 on T-Mobile.
Disclaimer:
Rooting your device will void your warranty. WE are in not responsible for any damage, psychological trauma, robot uprisings, or other unfortunate incidents that may occur from your choice to use these methods.
What You’ll Need:
1. ODIN Ver. 1.8.4 (or greater). Can be found with Google.
2. Your correct Windows drivers. These can be had via Samsung Kies, which can also be Googled.
3. Clockwork Recovery ODIN for T-989. Download HERE or HERE.
MD5sum for reference: md5sum – 8bf6802a84d85aa7da0c1976c0f129d1
4: Superuser APK and su, which can be downloaded HERE.
5: An SD Card for Clockwork Recovery to work.
Step-by-Step Guide:
1: Make sure Windows recognizes your phone in ODIN. To do this use the adb command adb reboot download. Or Turn off the phone, hold both PWR + Vol Down, and plug in the USB cable.
2. Select the ‘PDA’ button and browse to recovery-cwm-hercules.tar.
3: Select ‘Start’.
4: The file should flash to recovery and reboot the phone.
5: After the reboot, mount USB storage and copy the Superuser.zip file to the SD card.
6: Reboot into recovery with the adb command adb reboot recovery or power off, unplug the USB, hold down the Vol Down+ Vol Up buttons and press Power.
7: You should boot into Clockwork recovery.
8: Perform a nandroid backup from the backup/restore menu.
9: Select ‘Install ZIP from SD Card’ choose the Superuser.zip file, and let it install.
10: Reboot your device.
Once your device reboots, you should be rooted with SuperUser access, and able to do almost anything with your Android device now. Now you can flash new ROM’s to your heart’s content.


VIDEO TUTORIALS


Monday 18 June 2012

How To Root Samsung Galaxy S2 at &t ICS UPDATE


How To Root Samsung Galaxy S2 at &t ICS


Samsung just recently rolled out to the Samsung Galaxy S2 GT-I9100 a new Ice Cream Sandwich update known to the community as the XWLPD build. For those of you who have just flashed the recent firmware, you may already know that flashing official ROMs such as the XWLPD firmware will mean losing your root privileges.
Luckily for Galaxy S2 owners, XDA Developers member Chainfire has already made an exploit that will allow you to root your phone, as well as install ClockworkMod Recovery using the CF-Root Kernel. The kernel is fully stock and is primarily based on the original firmware, with some added features. The CF-Root Kernel has root access, BusyBox 1.16.2, and ClockworkMod Recovery.
Learn more about rooting and installing this modified kernel by checking our step-by-step guide below.

Warning

  • The instructions in this guide are intended for use with the Samsung Galaxy S2, model number GT-I9100. Applying these instructions on another device or model may produce undesired outcomes.
  • The information in this guide is provided for instructional and educational purposes only. There is no guarantee that these instructions will work under your specific and unique circumstances.
  • Use these instructions at your own risk. We shall not hold any responsibility or liability for whatever happens to you or your device arising from your use of the info in this guide.
  • Read and understand the whole guide first before actually performing the instructions.

Requirements

  • Samsung Galaxy S2 GT-I9100 running stock Android 4.0.3 ICS build XWLPD
  • A Windows PC
  • Samsung USB device drivers for the Galaxy S2 installed on your PC. You can use Samsung KIES to obtain the drivers.
  • Temporarily disable Samsung KIES, anti-virus tools, and firewall programs as they are known to interrupt the installation process.
  • Enable USB Debugging on your phone. You can do this by heading to Settings > Developer Options > USB Debugging. Make sure that there is a check mark beside that option.
  • Backup all personal data on your phone to make sure you have a copy of your personal data (e.g., contacts, SMS, MMS, Internet settings, Wi-Fi passwords, and the like) in case the procedure in this guide erases such data.

Instructions

  1. Download the CF-Root Kernel (CF-Root-SGS2_XX_NEE_LPD-v5.4-CWM5.zip, 6.2 MB) package to your computer.
  2. Download Odin3 1.85 (Odin 1.85.zip, 200 kB) to your computer.
  3. Extract the downloaded CF-Root Kernel ZIP file using any extracting software such as WinZIP or 7-Zip. Place the extracted file inside a single folder. Important! Do not extract the TAR file.
  4. Extract Odin 1.85.zip and place the contents inside a single folder.
  5. On your PC, launch the Odin3 application by double-clicking Odin3 v1.85.exe.
  6. Switch off your Samsung Galaxy S2.
  7. Boot your phone into Download Mode. You can do this by pressing and holding down the Volume Down, Home, and Power keys together until you are greeted with a Warning!screen. Press the Volume Up key to enter Download Mode.
  8. Connect your Galaxy S2 to your PC via USB cable. You should see a message “Added!” under Odin’s message box found on the bottom-left of the application. This should indicate that your phone’s USB drivers have been installed.
  9. In Odin3, click the PDA button, then browse for the CF-Root-SGS2_XX_NEE_LPD-v5.4-CWM5.tar file. Make sure that Repartition is not checked.
  10. Important! Do not make any changes in Odin aside from the one’s mentioned in this tutorial. Doing so may cause irreversible damage to your device.
  11. Select the Start button in Odin to begin flashing the CF-Root Kernel on your Galaxy S2.
  12. Once the firmware has been installed, your phone should automatically reboot. A “PASS” message with a green background will be shown on the top-leftmost box of Odin.
  13. Disconnect your phone from your PC once you see the Samsung logo.
Congratulations! You have successfully rooted your Samsung Galaxy S2 GT-I9100 using Odin3. Enjoy the benefits of having a rooted device.

Saturday 16 June 2012

How To Root HTC RHYME

How To Root HTC RHYME


What you need: - Downloads: HTC Sync (who are not yetaccording to HTC instructions) you need also: Android SDK (who has not yet there) http://developer.android.com/sdk/index.html(android-sdk_r16 windows.zip) Java first Java itselfhttp://java.com/de/ second Java SE Development Kit 7u2http://www.oracle.com/technetwork/ja...d-1377129.html (from the list just select your OS, eg Windows x64) Alternatively, why?HTC wants you here now, the Android SDK downloaded updated with java etc etc blah to 3 specific files then get out to fish:Fastboot.exe AdbWinApi.dll Adb.exe I saw you uploaded the files above, you can save in good times 30min away from the official who, ect with android SDK -wants to> go Have fun ^ ^ ------------------- go: (I will NOT ALL translate from English to German (eg the warnings), please use a translator or someone asks / or here, if ye are not sure) first goes on http://www.htcdev.com/
second "Unlock Bootloader" and "Get started" third OF COURSE you read your way through the warnings, loss of warranty, etc!fourth "Begin Unlock Bootloader" fifth Join you there, or you are not signed! 6th Again, read warnings, YES, we go further. 7thAgain, read what you have to confirm with hooks. 8th The manual itself: Step 1: According to HTC now you have to take out the battery and clean again. yes no .... is clear .... ? orSettings-> Power-> Quick start off step 2: Turn off the volume button DOWN to the press is like time on / off power button, to get into the bootloader. step 3: Use the buttons volume up, down to FASTBOOT highlight and confirm this with the on / off power button. Step 4: to Close the Rhyme with the USB cable to the PC. Now it gets funny: Step 5: Create a new folder MOST DIRECTLY TO C: (top directory in your hard drive) with the name "Android" for example C: \ Android DA PURE have the 3 files I've listed above (with Download, extract the zip, of course.)Fastboot.exe AdbWinApi.dll Adb.exe (who is the official way (manual or RNAs of files on Android SDK will go) should, in this step follow the official instructions) Step 6: Now open the "Run" console. For example you can find the windows 7 under Start-> All Programs-> Accessories -> RUN writes there simply pure: cmdand confirm this with OK Step 7: A DOS console opens writes there now follows the same clean: cd c: \ Android (C: \ Android stop THEN, if you have named the folder in step 5 above) when the folder "xyz "is, then writes: cd c: \ xyz Step 8: now writes:fastboot oem get_identifier_token a large text block should now appear ... (If your device is still in the boot loader / fastboot connected via usb is: P) Step 9: Copy of the token-text blockmoves with the mouse into the window, right click on the text-block-> Mark with then the mouse, HAIR EXACTLY the board (see picture ) mark when this is highlighted in white . AGAIN clicks the right mouse button on the selected field , the text block is now copies (as in copy & paste) . this best fits into a txt an editor.ATTENTION; CONSOLE OPEN RUN! Step 10: Is t so now its back on the HTCdev instructions (also as in step 10), sooooo empty field below the "My Device Identifier Token:" insert your token and send it to block "submit" to HTC. now you will get soon , an email from HTC (email address of the registration) , both with a LINK "Click here to continue the boot loader unlocking process."as well as Annex "Unlock_code.bin" Step 11: Download the attachment, and in the folder c: \ Android ( \ Krikkelkrakkeldingsdabums: or c ) file and then click on the link inthe email Step 12: Now go back into the console back writes:fastboot flash unlocktoken Unlock_code.bin Step 13: On your HTC Rhyme you see now a Final Warning with the volume keys you can up and down and confirmed with the ON / OFF power button of course (when read) with "YES". device restarts.Feddisch bootloader .... dead .. your warranty too: P you can now in the first POST I , proceed to step 2 (ZERGRUSH).


Friday 15 June 2012

How to Root Samsung Galaxy S GT I9000 on Value PACK XXJVU 2.3.6 Firmware


How to Root Samsung Galaxy S GT I9000 on Value PACK XXJVU 2.3.6 Firmware


we saw on how one can easily update their Galaxy S GT I9000 phones with the latest value pack released by Samsung and today in this we will check out on how to root the same. So, before you proceed you need to check whether you are on XXJVU Firmware or not which you can check from the path Settings > About Phone > Firmware Version. Once you confirm the same, you need to proceed to the procedure which is mentioned below. Once you root this firmware, we will see on how one can install the latest version of Ice Cream Sandwich over the next few coming days.
Recommendation: So as to avoid from the data loss / data corruption or say FORCE Close errors, you need to Root the device just after updating the firmware.
Disclaimer: At Android Advices, we have made sure in all respects that all the information regarding the firmware update is mentioned correctly in this article. We should not be held responsible for any damage happened to your device in the process of updating your phone which is very unlikely if you follow the instructions mentioned in the article.
Advantages of Rooting:
  • First and Foremost, rooting allows the customizations like it allows the installation ofCustom ROMs in the phone.
  • Allows you to convert file systems from the laggy RFS to the speedy EXT4,
  • Allows you to remove the system apps which come by default with the phone,
  • Allows you to apply host of other customizations
Rooting voids the warranty, though it can be reclaimed by updating with the default factory firmware on unlocked phones which doesn’t come with the boot loader lock. So, let’s head to the procedure to root Galaxy S on XXJVU Firmware in the procedure below.
Screen Capture 1 CWM Superuser SU 11 CWM FEATURES 1 CWM FEATURES 2 SU 2
Procedure to Root Samsung Galaxy S on XXJVU Firmware:
  • Download XXJVU Rooting package from here in your computer. Extract the same preferably to the desktop, in the process of extraction you will be prompted to enter the password. Enter the password as “androidadvices.com”.
Password Value Pack
  • Once the files are extracted, you need to Open ODIN in your computer and turn off the phone so as to enter it in Download Mode.
Rooting PACK CONTENTS
  • The download mode can be entered by pressing  down on Volume Down Key + OK button, and holding both simultaneously press the Power Button. You can also refer to the video below to know more on how you can enter into the download mode for more convenience.
  • Once download mode is entered, connect the phone to the computer using the USB cable and then in the Odin you will see that the ID : COM section will turn yellow which will mean that all the drivers have been successfully updated and you are now ready to proceed to the next step.
odin for rooting xxjvu Phone Connected XXJVU
  • In Odin, click on “PDA” and choose the file “CF-Root-XX_OXA_JVU_2.3.6-v4.3-CWM3RFS” from the extracted files. After selecting and checking the same, click on “Start” to start the rooting process.
Select Files XXJVU
  • It will take around 4 minutes for the rooting process to be completed. It may sometimes take less time too. As soon as the rooting process is done, the device will be rebooted. To find out whether the device has been successfully rooted or not, you will have to find two additional applications which are “CWM” and the “Super User” which will mean that the phone has been successfully rooted.
  • Turn OFF the phone so as to restart in the recovery mode. The recovery mode can be entered by pressing  Volume UP on Volume Down Key + OK button, and holding both simultaneously press the Power Button. You can refer the below mentioned video on how you can enter into the recovery mode.
  • In the recovery mode, select Wipe data/factory reset and also you need to select Wipe Cache partition and then reboot your device by selecting reboot system now option. Please note that you will have to ensure that you don’t select any other options or else there is a high probability that you may erase all the data which is even stored in the Internal / External SD card.
recovery mode
  • If you face any issues in the process of rooting this firmware then you need to re insert the battery and then again follow the procedure again.
So, in this way you have successfully rooted your Galaxy S running on the Gingerbread 2.3.6 Value pack. Do let us know just in case if you have any issues as we will try our level best to sort out the same in the comments section.

HOW TO ROOT HTC ARIA


HTC Aria Rooting Guide


This was orginally posted on XDA-Developers by gtg465x with credit also to eugene373 and attn1:
Prerequisites...

Note: If you're in Linux, you only need to do Step 4, Step 6, and Step 7.

Step 0.
Download and install HTC Sync: http://www.htc.com/us/support/aria-att/downloads/

Step 1.
Download and unzip the Android SDK: http://developer.android.com/sdk/index.html

Step 2.
Go into the folder where you unzipped the Android SDK and open "SDK Setup.exe".
If you aren't greeted with a failed to fetch URL error, proceed to Step 3. If you did receive this error, go to Settings in the "Choose Packages to Install" window and check "Force https;//... sources to be fetched using http://..."
Close and re-open "SDK Setup.exe".

Step 3.
When the "Choose Packages to Install" window pops up, make sure the package "Usb Driver package, revision x" is checked. You can uncheck everything else. Click Install. After it downloads and installs, close "Android SDK and AVD Manager".

Step 4.
With your device unplugged from your computer, go to Settings > Application > Development on your device and turn on USB Debugging.

Step 5.
Now plug your device in to your computer. This is just to make sure the USB drivers are installed.
Once they are installed, unplug your device and turn it off.

Step 6.
This step is optional, but it may prevent an error later on in the process. If you've never formatted your SD card from a computer, remove it from the phone and format it in Windows or OSX with an external card reader. Then place the formatted card back in your phone, but leave the phone off.

Step 7.
Download the updated Root.zip from eugene373's guide: Root the Slide & Other HTC Devices*6/15/2010* How-To Updated 6/29/2010


Now let's get started...

Step 0.
Unzip Root.zip

Step 1.
Place the contents ("update.zip", "ota.zip", and "loop") into the Android SDK tools folder.

Step 2.
Open Command Prompt or Terminal and CD to the SDK tools directory.

Step 3.
Power on your device into the bootloader by holding the "Volume Down" key and simultaneously pressing Power.
Once you're in the bootloader, wait about 30 seconds until some diagnostic checking is done.
Press "Volume Down" to highlight Recovery, but do not push Power to execute just yet.

Step 4.
Now run your loop file from the prompt (either type "loop" in Windows or "./loop.sh" in Linux) (refer to ice3186's post for Mac instructions)
Note: The loop does nothing but show you the connection status of your phone. It's not technically required, but we'll use it in this guide.

Step 5.
Once the loop is running in your prompt, get ready to connect the phone to the computer with the USB cable, but don't connect one end quite yet. With Recovery still highlighted on your phone, you will need to push the Power button and then immediately plug in the other end of the USB cord.

Step 6.
After a few seconds, you should see your device listed in the loop.

Step 7.
Unplug the USB cable from the bottom of your phone and plug it back in. You probably don't need to do this, but let's be safe. Wait for your device to show up in the loop again. Hit CTRL-C to terminate the loop.

Step 8.
You should see a triangle/exclaimation over a phone graphic.
Hold the "Volume Up" key (note it's Volume UP this time) and simultaneously press Power.
After the menu comes up, use the volume and power buttons to select and run update.zip. (This will fail, but we already know that! Select it anyway.)

Step 9.
Paste the following command into your prompt and press Enter.
adb push ota.zip /sdcard/update.zip (*OSX users add a ./ in front of all terminal commands please)

Step 10.
This is very important!! Have this next command ready in your prompt before running update.zip again!!
This is the command. Paste it into your prompt, but DO NOT press Enter yet.
adb push update.zip /sdcard

Step 11.
Run update.zip and as soon as you see a faint progress bar appear behind the text at the bottom of the screen, push Enter to execute the command in your prompt.

Step 12.
If successful, you should see Clockwork Recovery and you now have Su and Superuser.apk installed! You can now reboot your phone into the OS to verify. If unsuccessful, repeat steps 11 and 12.

Step 13.
This step is optional, but it will save you the pain of going through all of these steps again in the future. 
Unrevoked team: Recovery reflash tool (updated - Now for Aria/Liberty!)

SITE MAP

MAIN MENU


--  HOME


--  PRODUCTS


--  NEW POST


--  ALL TUTORIALS


--  CONTACT US


--  SITE MAP


Thursday 7 June 2012

how to root HTC Droid Incredible 2

How to root HTC Droid Incredible 2
Walkthrough
============================


Preliminary
==============================
Using the following guide we will gain S-OFF, install a custom recovery (ClockworkMod), and get Superuser access (Sexy); through use ofRevolutionary.
The utility it was created by AlphaRev and unrevoked, all credit goes to them.
Consider donating to them if you feel so inclined, they do a lot for the community!


!!NOTICE!!
Please realize that there are risks involved. Anything that happens to your phone, which includes but is not limited to; Bird Flu, Smallpox, and Anthrax exposure, is in no way anyone on this site's responsibility, proceed with caution.


Also: I did all of this on a Windows machine, any Linux/Mac-dependent situations that I've missed feel free to fill in.


Files needed
==============================
Before starting the process download these files:


Note: Windows Users must download and install HTC Fastboot Drivers beforehand. [HERE]


Download Superuser zip and put it on the root of your SD Card (or in a folder if so so prefer, just remember where) [DOWNLOAD HERE]


Download Revolutionary for your selected OS [HERE]
Note: Leave the page open as we will need it while running Revolutionary.


Rooting Process
==============================


1. Extract and Run Revolutionary
Revolutionary will start and say "Waiting for device..."
Enable USB Debugging ( Settings > Applications > USB Development )
Disable Fastboot ( Settings > Power )
Plug in your Incredible 2


2. Serial Number and Beta Key
Revolutionary will give you your device's Serial number, on the page you downloaded Revolutionary there should now be a blue box, below the download links.
Select your OS, Device, HBOOT Version, and then input the Serial number and proceed.
You will be given a Beta Key you need to input in Revolutionary and then proceed.


3. Wait
Revolutionary should boot your phone into HBOOT a couple times.
After some time it should now read "-Revolutionary-" at the top of your HBOOT screen.
Revolutionary should ask you whether you'd like to flash ClockworkMod (You do).


*****If ClockworkMod fails to download or flash you can do it manually [GUIDE]*****


4. Install Superuser and Reboot
After Revolutionary is done talking about Lemons and Lemonade you can scroll down (Volume) on the HBOOT screen to "Recovery" and select it (Power).
This should boot you into ClockworkMod
Scroll down and select to "install zip from sdcard">"choose zip from sdcard" then select the "su-2.3.6..." zip file.
After it's all done back out of the menus and reboot.
Check in your app draw for the "superuser" app to ensure you are rooted.


Congrats, you should now be rooted!


Have trouble with the guide? Either post your experience here or take a quick look at unrevoked's Common Problems & Questions HERE.


Want to unroot? Check out this thread.